You probably use your Yamaha soundbar remote regularly if you’re like most people. But what would happen if the batteries ran out? Although you might be tempted to simply toss the remote and get a new one, doing so would be a waste of money. You can quickly replace the batteries in your Yamaha soundbar remote by following a few easy steps.
So, how do you change the battery in the Yamaha soundbar remote?
Before you can replace the battery, you’ll need to remove the rear cover of the soundbar remote. After that, you can safely remove the old battery and replace it. Before reinstalling the rear cover, it’s important to make sure the new battery is placed correctly.
Here is a comprehensive guide explaining step-by-step how to replace the battery in your Yamaha soundbar remote.
How to Change the Battery in a Yamaha Soundbar Remote: A Step-by-Step Guide?
Here’s how to change the battery in the Yamaha soundbar remote control. Let’s look at the Yamaha soundbar remote’s battery-change procedure.
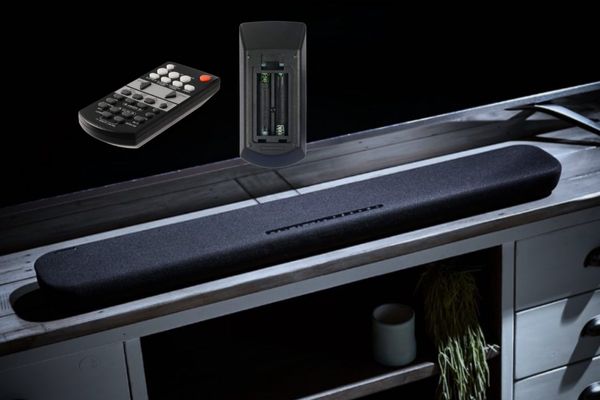
1. At the very beginning, find the release button. This is typically found on the remote’s back.
2. To remove the cover, gently push the release button and the remote cover will slide off.
3. Track down the batteries. The remote typically comes with two batteries.
4. Remove the old batteries and replace them with fresh ones.
5. Pressing the release button will close it after you slide the cover back.
Your Yamaha soundbar remote should work now! If not, you might need to do more troubleshooting with your Yamaha owner’s manual if it’s not working.
Clean the Battery Terminals on the Remote Control.
The battery compartment on the remote control could be dirty. Let’s check how to clean it properly.
- While the batteries are still inside the remote control, remove the battery cap and roll the batteries with your thumb.
- If the remote control works after rolling the batteries, you can safely remove the batteries and use a cotton bud or soft cloth to clean the remote control terminals with a tiny solution of alcohol.
- Put the remote control batteries back in and close the back cover.
By following this process, the battery of your Yamaha soundbar remote will last longer.
How Do I Change The Battery In My Screw Attached Remote?
You might be wondering how to replace the battery of your Yamaha remote if it isn’t working properly. Additionally, if the remote has a screw attached to the back, this will blow your mind.
You may have made up your mind to throw this remote into the garbage and are ready to buy a new one. But no need to worry, we have got you covered.
Fortunately, changing the battery in your remote is simple and can be done with just a fresh CR2032 battery and a screwdriver.
The screw on the remote’s back is the first thing you should find, and it’s typically found around the remote’s bottom. You should remove the screw with a screwdriver.
Once the screw has been taken out, the remote’s back will come out. Now the battery compartment will be visible.
The old battery should be immediately taken out of the compartment and replaced with a new one. Make sure that the battery’s positive side is facing up when installing it.
After the new battery has been installed, put the back of the remote on and secure it with a screw.
The remote control should now be fully functional.
Conclusion
With this helpful blog post, you can now change the battery on your Yamaha soundbar remote. We sincerely hope that you find this information very useful and that you’ll be able to use your remote for a long time. We’re grateful for your patience as you read.
Related –
Connect Yamaha Soundbar To Wi-Fi
Link My Yamaha Soundbar To My TV